Sunday 21 December 2014

Paneer Aloo Tikki

Paneer Aloo Tikki is a tikki prepared with paneer and potatoes. You can either prepare a tikki chaat by toping it with curd, tamarind chutney, green chutney, sev, etc or you can also enjoy the tikki with ketchup. Either way it tastes delicious.


This is my second entry to the Oxy Fryer recipes. I have used Oxy fryer for oil free healthy cooking. You can prepare the same on a tava by shallow frying.

Ingriedients:
Mashed Potatoes - 1 cup
Grated Paneer\ Cottage Cheese - 1 cup
Chilli powder - half teaspoon
Chat Masala - 1 teaspoon
2 Green chillies - chopped
Coriander leaves - finely chopped
Boiled Corn Kernels - half cup
Bread Crumbs - half cup (Optional)
Salt
Oil - 1 teaspoon (Optional)

Procedure:
1. In a mixing bowl, mix all the ingriedients except oil and mix well.
2. Make small tikkis as shown in below picture.


3. Brush both sides of tikkis with one drop oil. This step is optional.
4. Pre heat the oxyfryer for 5 minutes at 160 degress.
5. Place the tikkis on the tray of oxy fryer and  keep it again for 15 minutes at 160 degrees.
6. After that , just flip the tikkis to the other side and keep for 5 more minutes. This is to ensure that both sides become crispy.

The delicious Paneer Aloo Tikki is ready.

Serve it with mint chutney or tamarind chutney or just ketchup.

Monday 15 December 2014

Kaddu ki Sabji\ Pumpkin Sabji\ Lal Bhopalyachi Bhaji

Survey says that consuming one cup of cooked pumpkin would provide well over 100% of your daily needs for vitamin A, 20% of the daily value for vitamin C, 10% or more for vitamin E, riboflavin, potassium, copper and manganese at least 5% for thiamin, B-6, folate, pantothenic acid, niacin, iron, magnesium, and phosphorus.

In short, it is very highly rich in vitamins and minerals. That means it has many health benefits like boosting the vision, building immunity, fighting cancer, lowering blood pressure, etc.

One of the easiest way to include this in our diet is in the form of this very simple Pumpkin Sabji or Kaddu ki sabji as it is popularly known in Hindi.

Below is the simple recipe of Kaddu ki Sabji


Ingriedients:
Pumpkin\ Kaddu - half kg
Mustard seeds - half teaspoon
Jeera\ Cumin seeds - half teaspoon
Turmeric powder - 1 teaspoon
Hing\ Asoefatida
Green chillies - 1
Karipatta - 4-5 leaves
Jaggery - 2 tablespoon
Salt
Oil - 1 tablespoon

Procedure:
1. Wash the pumpkin, peel the skin and cut it into small cubes.
2. Take a vok, add 1 tablespoon oil.
3. Once oil is hot, add half teaspoon mustard seeds.
4. Once the mustard seeds splutter, add the cumin seeds, hing, green chillies and karipatta leaves.
5. Next add turmeric powder.
6. Finally add the diced pumpkin.
7. Add salt and then add jaggery and mix well.
8. Let it cook for around 10 minutes. Keep it on a low flame with the lid covered.
9. Garnish with chopped coriander leaves.

The delicious Kaddu ki sabji is ready.

Serve it hot with Roti.

Notes:
1. Do not throw away the pumpkin skin. Instead you can prepare the pumpkin skin chutney. For recipe click the below link
Pumpkin Skin Chutney


Wednesday 10 December 2014

Pumpkin Skin Chutney

Pumpkin has a lot of health benefits and so does its skin. So while preparing pumpkin sabji, do not put away its skin. Instead you can prepare this delicious chutney in no time. It can also be stored for 3-4 days. It goes as an excellent side dish with rice-dal or roti-sabji.


Ingriedients:
Pumpkin peel - 1 cup
Grated dry coconut /kopra - half cup
Green chillies - 2
mustard - half teaspoon
jeera - half teaspoon
Salt - 1 teaspoon
Oil - 2 tablespoon

Procedure:
1. Wash the pumpkin and peel the skin and keep aside.
2. Next grate the dry coconut.
3. Grind the ridge gourd skin, grated dry coconut, green chillies to a coarse powder in the mixer. Do not add water while grinding.
4. In a pan, add 2 tablespoon oil, add mustard. Once it splutters, add jeera and then the ground mix.
5. Add pinch of salt and mix it well.
6. Let it cook for another 10 minutes. In between keep stirring so that it does not get burnt.


Serve it as a side dish with rice-dal or chapati-sabji.


Sunday 7 December 2014

White Cucumber Chutney

Have you ever heard of white cucumber chutney. Yes, we can prepare chutney also from white cucumber and it tastes really delicious. It is very easy to prepare and can be served as a side dish with roti or rice.

If you wanna try out something new, then cucumber chutney is the best option.


Ingriedients:
1 Cucumber - cut into cubes (Do not discard the skin)
2 Green chillis
Hing\ Asoefatida
Mustard seeds - hald teaspoon
Jeera\ Cumin seeds - half teaspoon
Karipatta leaves - 3-4
Oil
Salt

Procedure:
1. Grind the cucumber pieces togather with the green chillies to a fine paste. Do not add water while grinding.
2. Add salt as needed.
3. To prepare the seasoning, take the tadka pan, pour 1 tablespoon oil.
4. Add mustard, once it splutters, add jeera.
5. Next add hing and karipatta.
6. Pour this over the cucumber chilli paste.

Cucumber chutney is ready.

Serve it as a side dish with rice or roti.


Sunday 16 November 2014

Sabudana Vada\ Sagu Vada

Sabudana Wada is one of the most popular snack items in Maharastra and is mostly eaten on fasts. I usually avoid preparing this as it is very oily. But now I have a oil free way of preparing this - thats with my new Kenstar Oxy Fryer.


Last week we ordered the Kenstar Oxy Fryer from flipkart. Oxy Fryer is baically used or Oil free cooking. We can enjoy our otherwise oily food in a healthy and oil free manner. It is very easy to use as well as very easy to clean. Below is the picture of my Oxy Fryer.


It has become my new found Addiction. I have already tried the french fries, potato wedges and garlic bread. This weekend I tried sabudana vada and it came out just awesome. I am so happy that I can enjoy all these items in an oil free manner :)

Below is the recipe of Sabudana Vada. I have prepared it in Oxy Fryer. If you dont have an oxyfryer, you just need to shallow fry the tikkis in oil.

Ingriedients:
Sabudana\ Sabakku\ Sagu - 1 cup
Peanut powder\ Shengdanyachi kut - half cup
2 Potatoes - boiled and mashed
Chilli powder - 1 teaspoon
2 Green chillies - chopped
Coriander leaves - chopped
grated ginger - 1 teaspoon
Lemon juice - 1 tablespoon
Salt
Oil - 1 teaspoon (Optional)

Procedure:
1. Soak the sabudana for atleast 5-6 hours in water.
2. In a mixing bowl, add all the ingriedients except oil and mix well.
3. Make small tikkis as shown in below picture.


4. Brush both sides of tikkis with one drop oil. But this step is optional.
5. Pre heat the oxyfryer for 5 minutes at 160 degress.
6. Place the tikkis on the tray of oxy fryer and  keep it again for 15 minutes at 160 degrees.
7. After that , just flip the tikkis to the other side and keep for 5 more minutes. This is to ensure that both sides become crispy.


Delicious oil free Sabudana Vada is ready

Serve it with mint chutney or ketchup. No one can eat just one :)


Notes:
1. If you do not have an oxy fryer, no worries. You can shallow fry the tikkis with oil in a frying pan for about 5 minutes. Then flip it to the other side and cook it for 5 more minutes.
2. Oxy fryer does not give the same taste as the one with shallow frying with oil. It gives slighly different taste but must say food tastes really delicious. You can eat as much as you like -  guilt free ;)
3. For preparing the sabudana vada on fasts, do not include the grated ginger.

Tuesday 11 November 2014

Dudhi Bhoplyache Thalipeeth\ Pumpkin Thalipeeth

Dudhi bhoplyache thalipeeth is another healthier variation to the delicious thalipeeth.

Pumpkin is commanly known as Dudhi Bhopla in marathi.The addition of Pumpkin makes the thalipeeth really delicious and mouth-watering and healthy too.


Ingriedients
Wheat flour - 4 cups
1 onions - finely chopped
2 green chillies - finely chopped
Grated pumpkin - 2 cups
Coriander leaves - finaly chopped
Ajwain - 1 teaspoon
Salt
Water
Oil


Procedure
1. In a bowl, add the chopped onions, finely chopped green chillies, wheat flour,chopped corainder leaves, grated pumpkin, ajwain and salt. Mix well.
2. Add water and prepare a dough. Also add little oil while preparing the dough.
3. Make small round balls of the dough.

4. Next take a pan and add a pinch of oil. place one round ball on the pan. and pat it with your hand till it becomes round and thin.
5. Make a small hole at the centre and pour little oil in it. Also add oil from all sides.
6. Fry on a median flame without covering the pan by a lid. After 3-4 mins, turn the thalipeeth other way round, still maintaining the medium flame. Fry for another 3 minutes. Thalipeeth is ready to be served.

Serve it hot with pickle and curd.

Tips:
1. In case you are not comfortable patting the thalipeeth with your hands directly on the hot tawa, you can take a clean plastic and pat it on that. Once it is done, place it on the tawa and fry it as mentioned in the steps 6 and 7.
2.The dough should be a little sticky to get a perfect thalipeeth. In that case, dip your finger in water while patting it on the tawa (or the plastic) to avoid sticking to your hand.

Monday 10 November 2014

Paneer Butter Masala

Paneer Butter Masala is a typical North Indian recipe wherein the Paneer(Indian Cottage Cheese) is cooked in a creamy tangy tomato based gravy.

Initially I had the assumption that we can enjoy this delicious recipe only in the restuarant, thinking that it must be a really tedious recipe.

One day I just gave a try at home and it turned out really delicious. Much to my surprise, it was quite a simple and easy recipe.

So guys...Here it goes...


Ingriedients:
2 Onions
1 Tomato
6-7 Cahewnuts
Butter - 2 tablespoon
Paneer - 300 gms (cubed)
Ginger Garlic paste - 1 teapoon
Cinnamon - small piece
Cloves - 2
Bayleaf - 1
Turmeric powder - half teaspoon
Chilli powder - 1 teaspoon
Cumin powder - half teaspoon
Garam masala - 1 teaspoon
Corainder powder - half teaspoon
Cream - 1 tablespoon
Water
Corainder leaves

Procedure:
1. Soak the cashewnuts in water for around 20 mins.
2. Grind the cashewnuts with 1 tablespoon water in the mixer and keep aside.
3. Fry the onions with one teaspoon oil. Once it cools down grind it in a mixer.
4. Also grind the tomatoes in the mixer and keep aside.
5. Take a vok, add 2 tablepoon butter. Next add the cinnamon, cloves and bayleaf.
6. Add the ground onions and let it cook for some time.
7. Next add the turmeric powder, chilli powder, cumin powder, corainder powder and garam masala.       Also add the ginger garlic paste.
8. Next add the chopped tomatoes and let it cook till the butter starts leaving the pan.
9. Next add the cashew nut paste.
10. Add the paneer and then add sufficient water around 1 cup.
11. Add 1 tablespoon cream.
12. Let it cook for around 10 minutes.
13. Garnish with chopped corainder leaves

Paneer Butter Masala is ready to be served.

Serve it hot with rice or chapati.

Sunday 2 November 2014

Palakchi Patal Bhaji\ Spinach leaves curry

Palakchi Patal Bhaji is a typical marathi way of cooking the palak along with the besan. Besan and groundnut powder is very commanly used in marathi cuisine. Palak means spinach, patal meaning gravy and bhaji stands for curry in marathi.

Here is a simple yet delicious recipe of Palakchi patal bhaji.


Ingriedients:
1 bunch palak leaves - cleaned and chopped
1 tablespoon peanuts
1 teaspoon red chilli powder
Dry coconut pieces - half cup
2 tablespoon Besan
1 teaspoon mustard
1 teaspoon jeera (Cumin seeds)
Hing
Garlic - 10 petals
Oil
Water
Karipatta - 5-6 leaves
Salt
Jaggery

Procedure:
Palak Gravy Prepartion:

1. Pressure cook the chopped palak leaves along with peanuts and dry coconut along with half cup water.
2. Once done, strain the water and keep aside.
3. When the palak is cooled down, add besan to it and mix well. Make sure that there are no lumps.
4. Once besan is applied to palak, add the palak water which was kept aside earlier and keep it for boiling.
5. Add salt and Jaggery.
6. Boil this for 10 mins.

For Seasoning
1. To prepare seasoning, in a small kadhai, pour 2 tablespoon oil, add mustard and wait till it splutters.
2. Add Jeera. Once it splutters add garlic and fry till it is golden brown.
3. Add hing, garlic, karipatta and chilli powder.
4. Add this seasoning to the palak gravy

Palakchi Patal Bhaji is ready to serve.

Serve hot Methichi Patal Bhaji with rice or chapathis.


Wednesday 22 October 2014

Poha Chiwda

Its Diwali time!! A very happy diwali to you all!!

One of the most commanly prepared snack item for Diwali is Chiwda.
For those guys who are novice to cooking, this is the best option to try as it is the easiest among all the Diwali snacks recipes.

Here is the simple recipe of a healthier version of Chiwda ;)


Ingriedients:
Thin Poha\ Avalakki\ Flaked rice - 500 gms
Groundnuts - 1 cup
Chana dal(the one used for preparing Chiwda) - half cup
Cashewnuts - half cup
Dry coconut pieces - 1 cup
Karipatta leaves - around 10
Raisins - half cup
Mustard seeds - half teaspoon
Jeera seeds - one forth cup
Sauf\ Fennel seeds - one forth cup
Corainder seeds - half cup
Turemeric posder - 1 teaspoon
Chilli powder - 1 teaspoon
Green chillies - around 5
Hing \ Asoefatida
Oil
Salt
Sugar - half cup powdered

Procedure:

Preparing Chiwda masala:
1. Dry roast half cup corainder seeds, one forth cup jeera seeds and one forth cup fennel seeds.
2. Grind it to a fine powder in the mixer.

Preparing Chiwda:
1. Dry roast the poha and the groundnuts seperately and keep them aside. While roasting poha, add some salt.
2. Deep fry the cashewnuts, groundnuts, dry coconut pieces, dal, karipatta leaves, raisins and keep it aside.

3. In the same vok, add 4 tablespoon oil, Next add half teaspoon mustard and half teaspoon jeera. Once they splutter, add hing and green chillies. Once they are fried, turn off the gas
4. Next add turmeric powder and chilli powder and also the prepared chiwda masala. Mix it well.
5. Finally add the roasted poha and mix them nicely.
6. Next add all the previously deep fried items to this and mix them well.
7. Add the powdered sugar and the salt and mix well.

Chiwda is ready


Store it in a air tight container once it cools down.


Tips:
1. If you use the thick poha, then they need to be deep fried in Oil before adding to the seasoning.


Monday 20 October 2014

Ghee\ Sajuk Tup

I still remember in my childhood days, when my mom used to prepare the ghee, our whole house was filled with the aroma of home made ghee. I remember how much i used to love this aroma and also the home made ghee.

Now I try to give the same to my daughter. Preparing ghee is a fortnightly affair for me.

Below is a simple step by step preparation of ghee from milk cream.


Procedure:

Collecting the milk cream
1. Collect the milk cream daily in a steel or glass container. Keep it in the fridge.
2. Initially add 1 tablespoon curd. Daily after adding the milk cream, stir it and keep it back in the fridge immediately.
3. Over a period of 2-3 weeks, once good amount of milk cream is collected, ghee can be prepared.

Preparing Ghee
1. Transfer the milk cream in a juicer. Add some water (around 2 cups) and run the juicer for about 2-3 minutes.
2. You will see the butter seperating from the butter milk.
3. If not, add some more water and run the juicer for about 2-3 minutes.
4. Trasfer the butter to a vok, and rinse it with water 2-3 times. This will allow the residual butter milk to be washed away. 


5. After seperating the butter, the leftover part is the butter milk. Tranfer the butter milk to a seperate container and enjoy it later.
6. Heat the butter for around 20 minutes.
7. You will see that initailly the butter melts and then turns into ghee. Below are some pics.


7. Transfer the ghee to a steel container.


8. The next day, it will solidify as shown below


Tips:
1. The vok used the prepare the ghee is loaded with ghee. Instead of directly putting it for wash, I usually prepare some curry in that. This way we do not waste any ghee.

Tuesday 14 October 2014

Plain Dosa\ Plain Roast

Dosa is just an all time favourite in my family. My hubby wouldn't mind eating it everyday and my daughter can eat it even all three times a day. Thats the same case with me too.

Earlier I used to buy the readymade dosa batter. Once I tried preparing the batter at home and the dosas came out really crispy and delicious. From then onwards, every saturday I prepare the dosa batter. Our sunday breakfast menu is fixed - Plain dosa with sambhar and chutney.


Ingriedients:
Dosa rice - 4 cups
Urad dal - One cup
Methi seeds - one-forth teaspoon
Poha\ Avalakki - half cup
Baking soda - a small pinch
Water
Oil - for frying Dosa

Procedure:

Preparing Dosa Batter
1. Wash and soak the dosa rice, urad dal and methi seeds atleast for 8 hours. I usually soak it in the morning and prepare the batter in the late evening.
2. Wash and soak the avalakki (Poha) 2 hours before preparing the batter.
3. To prepare the batter, grind the soaked dosa rice, urad dal, methi seeds and avalakki in the mixer. Grind the avalakki seperately in the mixer as it gets ground very fast.
4. Store this batter in a bigger conatiner as after fermentation, the dosa batter increases in quantity.
5. Add a pinch of baking soda , mix well and keep it outside for around 12 hours. I usually keep it overnight and prepare the dosas next day morning for breakfast.


Preparing Plain Dosa
1. Add salt to the dosa batter and mix well.
2. Heat and grease a non stick tava with oil.
3. Pour a laddle full of batter on the tava and spread it in a circular motion. Keep it on a high flame.
4. Sprinke some oil on the dosa from the sides.
7. Once the lower side is golden brown, turn to the other side. and keep on a medium or low flame.
8. Now turn it back to the original side and fold over.
9. Repeat with the remaining batter.

Serve it hot with Chutney and Sambhar

Thursday 9 October 2014

Beetchi Koshimbir\ Beetroot Salad

Did you know that our healthy salads can be also made very delicious and mouth watering.

Below is one such recipe to prepare the simple yet delicious beetroot salad. This simple recipe can be easily made a part of our everyday meal :)


Ingriedients:
Beetroot - 1
Groundnut powder - 2 tablespoon
Lime juice - 1 teaspoon
Sugar - half teaspoon
Salt

Procedure:
1. Grate the beetroot and keep aside.
2. In a bowl, add the grated beetroot, groundnut powder, sugar and salt and mix well.
3. Sprinkle lime juice before serving

Serve it as a side dish with Dal-Rice.

Tips:
1. Lime juice turns bitter with time, hence sprikle it just before serving.


Tuesday 23 September 2014

Aloo Sandwich Toast\ Spicy Potato Grill

It was my sisters birthday celebrations and I wanted to prepare some special dish that she really craves for. Finally I decided on her all time favourite - Aloo Toast. My mom used to make this when we were kids and it used to taste really awesome. I tried on similar lines and it came out very similar to her version.

Here is a very simple recipe of Aloo Toast. All you need is a sandwich maker or a grill. Since it came out really awesome, I though of posting it on my blog.


Procedure:

Preparing the Aloo Sabji

Ingriedients:
4 boiled potatoes
1 Onion - chopped
Ginger garlic paste - 1 teaspoon
Mustard seeds - half teaspoon
Cumin seeds\ Jeera - half teaspoon
Turmeric powder\ Haldi - half teaspoon
2 Green chillies - vertically slit
Hing\ Asoefatida - half teaspoon
Karipatta - 5-6 leaves
Salt
Corainder leaves

Procedure:
1. Take a kadhai. Add 2 tablespoon oil. Add mustard. Once it splutters, add jeera.
2. Next add hing, green chillies and karipatta.
3. Then add chopped onions and a pinch of salt. Fry till the onions are golden brown.
4. Next add turmeric powder add ginger garlic paste. and finally add the mashed pototoes. Mix well.
5. Add salt as per taste. Let it cook for 5 minutes.
6. Garnish it with chopped corainder leaves.


Preparing the Coriander chutney:
Refer to below link
Corainder Chutney


Preparing the Aloo Toast

Ingriedients:
Aloo Sabji
Corainder chutney
1 packet slice bread
Butter
Ghee - for greasing the toaster

Procedure:
1. Keep the sandwich maker ready. Grease it with ghee. This is needed so that the toast does not stick to the toaster.
2. In a plate, arrange 2 slices of bread. Spread the prepared aloo sabji on both of them evenly.
3. Take another 2 slices of bread. Apply butter on it evenly and then apply the chutney.
4. Place these 2 slices of bread on the other slices with aloo sabji.
5. Place them on the sanchwich maker and toast it.
6. Similarly continue with other bread slices.
7. Simultaneously prepare the sandwich to be toasted when the previous ones are getting toasted.

Serve it hot with tomato ketchup.


Tuesday 9 September 2014

Shepuchi Bhaji\ Sabsige Soppu\ Dill leaves Sabji

Dill is basically a aromatic herb which is native to Mediterranean and East European regions. But it is also commanly found in Goa, Maharastra and Karnataka.

It has immense health benefits. It contains many anti-oxidants, vitamins like niacin, pyridoxine  and dietary fibers, which help to control blood cholesterol levels. Dill is a good source of minerals like copper, potassium, calcium, manganese, iron, and magnesium. It helps in the secretion of bile and digestive juices, which further aid easy digestion. It helps stimulates the appetite as well. It is rich in calcium, which lowers the bone loss. This herb is fortifying in nature, by virtue of which it provides considerable strength to the body. And many more to pen down.

I usually do not prepare this vegetable. But after learning about all the health benefits, I could not resist a try. I cooked the shepu leaves along with moong dal on the recommendation of my friend, and it came out really awesome. Here is the simple recipe of Shepuchi bhaji.


Ingriedients:
Shepu\ Dill leaves - 1 bunch
Yellow Moong dal - half cup
1 onion - finely chopped
Mustard seeds - half teaspoon
Jeera\ Cumin seeds - half teaspoon
Garam masala - half teaspoon
Haldi\ Turmeric powder - half teaspoon
Chilli powder - half teaspoon
Hing\ Asaefatida
Salt
Water
Oil

Procedure:
1. Wash the moong dal.
2. Clean and chop the dill leaves.
3. In a pressure cooker, boil the dill leaves togather with the moong dal for 2-3 whistles. Also add half cup water while boiling
4. Next take a pan, add 2 tablespoon oil, add mustard. Once it splutters, add jeera and hing.
5. Add the chopped onions and let t cook till the onions turn golden brown.
6. Add half teaspoon each of turmeric powder, garam masala and chilli powder.
7. Add the boiled tur dal togather with the dill leaves.
8. Mix well and add appropriate salt.
9. Let it cook for 5 minutes.

The delicious Shepuchi bhaji is ready.


Serve it hot with rice or roti.

Tips:
1. You also also use tur\ arhar dal instead of moong dal. In that case, soak it for around 1 hour before pressure cooking it.


Wednesday 3 September 2014

Lauki Ka Kofta\ Bottle Gourd Kofta Curry

Lauki or Bottle gourd has many names in local dialects like dhudhi, calabash, hulu, etc. Lauki ki sabji is generally disliked by many people.

But lauki provides ample of health benefits. It is rich in vitamin B and C. It also contains minerals like sodium, iron, etc. It is good for the heart and the liver. It helps in digestion. And there are many more.

Due to all these health benefits we cannot skip it from our diet. One way of consuming lauki is by extracting its juice which tastes awesome. Another way is by preparing the delicious lauki ka kofta, which will be liked by everyone from your house.


Below is the recipe of delicious Lauki ka Kofta

Ingredients:
Lauki/ Bottle gourd - 1 small
Onions - 1
Tomatoes - 2
Ginger 
Garlic
Jeera\ cumin seeds - half teaspoon
Mustard seeds - half teaspoon
Besan\ Gram flour - 4 tablespoon
Hing\ asaefatida - 1 teaspoon
Chilli powder - 3 teaspoon
Turmeric powder\ haldi - 1 teaspoon
Garam masala - 1 teaspoon
Coriander powder -half teaspoon
Cumin\ Jeera powder - half teaspoon
Ajwain\ Carom seeds - 1 teaspoon
Coarinder leaves - finely chopped

Procedure:
Preparing Gravy
1. Grind the onions, tomatoes, ginger and garlic to a paste using a mixer.
2. Take a kadhai, add 1 tablespoon oil. Add mustard and wait till it splutters.
3. Next add the jeera.
4. Next add the hing and the ground onion tomato paste and fry it for till the raw taste of onion  dissapears.
5. Next add 1 teaspoon turmeric powder, 1 teaspoon chilli powder, 1 teaspoon garam masala, half teaspoon corainder powder, half teaspoon jeera powder and mix well.
6. Finally add 2 cups of water and let it cook for 10 minutes. Also add sufficient salt.
7. Gravy is ready. Keep it aside.

Preparing Lauki dumplings (Kofta)
1. Peel the skin of the lauki and grate it. Add some salt and keep it aside for 5 minutes.
2. Next squeeze the water of lauki by pressing in between your palms.
3. Do not discard the water, you can drink it. It is very healthy.
4. Squeeze the water from lauki in 2-3 rounds till the time all the water is drained off.
5. Take a mixing bowl, add the lauki, besan, 2 teaspoon chilli powder, 1 teaspoon ajwain  and salt and mix well.
6. Heat oil for deep frying. Once the oil is hot at 1 teaspoon oil to this prepared mix.
7. Using a spoon, leave the lauki besan mix prepared in the kadhi to prepare the lauki pakodas or dumplings.
8. Once done, take it on a tissue and keep it aside. You can enjoy some of these for starters.

Preparing Lauki Kofta curry
1. Add the lauki dumplings to the prepared gravy.
2. Garnish it with chopped corainder leaves.

Serve it with Roti or Rice.


Tips:
1. Drink the lauki juice or water drained from grated lauki immediately after extracting it as if kept for a longer time, it can cause stomach upset.
2. Adjust the water added to the gravy as per your needed consistency.
3. If you have a Oxy Fryer, you can prepare the lauki dumplings in that with low or no oil. I usually prepare the kofta in the oxy fryer. Trust me, the taste is just the same as the deep fried version.
4. Immediately cook the peeled or grated lauki. If kept for a longer time, can cause stomach upset. If lauki is a bigger one, I usually prepare lauki ka halwa of the remaining lauki. For halwa recipe, click Lauki Halwa

Tuesday 2 September 2014

Vegetable Thalipeeth

This is another healthier variation to the delicious thalipeeth. Adding boiled veggies to the thalipeeth not only increases its nutrition value, but also its taste.

Ingriedients
Wheat flour - 4 cups
1 onions - finely chopped
2 green chillies - finely chopped
2 cups boiled vegetables - like potatoes, carrots, cabbage, tomatoes
Coriander leaves - finaly chopped
Ajwain - 1 teaspoon
Salt
Water
Oil

Procedure
1. Mash the boiled vegetables with your hand or with the help of masher and keep it aside.
2. In a bowl, add the chopped onions, finely chopped green chillies, wheat flour,chopped corainder leaves, mashed vegetables, ajwain and salt. Mix well.
3. Add water and prepare a dough. Also add little oil while preparing the dough.
4. Make small round balls of the dough.
5. Next take a pan and add a pinch of oil. place one round ball on the pan. and pat it with your hand till it becomes round and thin.
6. Make a small hole at the centre and pour little oil in it. Also add oil from all sides.
7. Fry on a median flame without covering the pan by a lid. After 3-4 mins, turn the thalipeeth other way round, still maintaining the medium flame. Fry for another 3 minutes. Thalipeeth is ready to be served.

Serve hot with pickle and curd.

Tips:
1. In case you are not comfortable patting the thalipeeth with your hands directly on the hot tawa, you can take a clean plastic and pat it on that. Once it is done, place it on the tawa and fry it as mentioned in the steps 6 and 7.
2.The dough should be a little sticky to get a perfect thalipeeth. In that case, dip your finger in oil while patting it on the tawa (or the plastic) to avois sticking to your hand.

Sunday 24 August 2014

Coriander Chutney

Coriander chutney is one of the most commanly prepared chutneys in Indian household. It is served with Idlis, Dosas, Parathas, Upma, etc.

There are many variations of this chutney with the addition of Groundnuts, Coconut, Pudina, etc. In the recipe described below, I have added coconut togather with coriander leaves to prepare the coconut chutney.


Ingriedients:
Grated coconut - half cup
Coriander leaves - 2 cups
Green chillies - 2
Garlic petals/ Lasun - 8
Curd - 1 tablespoon (Opional)
Salt - as per taste
Water - as per needed consistency

Procedure:
1. In the mixer grind all the above ingriedients except curd to a fine paste.
2. Transfer it in a serving bowl. Add curd and mix well.

Notes:
1. Instead of curd, you can also add 2 tablespoon lime juice.
2. You can also add small piece of ginger while grinding.

Sunday 10 August 2014

Patoleo

Shravan is considered a very auspicious month as it comes fully loaded with many festivals. In Goa, we celebate Shravan sundays full of zest and vigour and every sunday, one of those special reserved recipes are prepared. One of it includes Patoleo. Yesterday, I prepared this for the first time, and it cam out really awesome. Other Shravan sunday recipes will be posted soon.

Patoleo is prepared by cooking the rice paste with coconut-jaggery mix in a special turmeric leaf which are also called as patoleo pana meaning patoleo leaves. Once cooked, these leaves pass on their aromatic flavour to the rice.

Ingriedients:
Rice - 1 cup
Grated coconut - half cup
Jaggery - half cup
Turmeric leaves\ Patoleo pana - around 8
Salt

Procedure:
1. Soak 1 cup rice in adequate amount of water for atleast 8 hours. Add very less water, just enough for the rice to get soaked.
2. Grind it in the mixer to form a thick paste. Do not add water while grinding. Add a pinch of salt while grinding.
3. In a mixing bowl, add the grated coconut and jaggery and mix well. Make sure no lumps of jaggery are present.
4. Next take the turmeric leaves, wash them well and wipe them with a clean dry cloth. Cut the ends of the leaf.
5. Next spread the rice paste evenly on the turmeric leaf. Try to form a thin layer. Spread the jaggery coconut mix in the center of the rice paste layer. At the end, fold the leaf and press its edges to seal it.  Place it on a steel plate.
6. In a similar way, continue with the other turmeric leaves till the rice paste gets over. Place them on a plate on by one.
7. Finally place the place in a cooker and cook it for 2-3 whistles.

The delicious Patoleo is ready.
Serve it hot along with the turmeric skin.

Notes:
1. While eating, the turmeic skin needs to be removed. It is not edible. It is used just for its flavour.
2. You can also soak rosematta rice (Ukdha rice) instead of normal rice. It tastes more delicious.
3. Another way of preparing the rice paste is to add 1 cup rice flour to half cup boiled water and a pinch of salt and knead it like dough. It you do not want to pre soak rice, then this is one alternative.
4. You can also add elaichi or cardomom powder to the coconut jaggery mix.


Monday 4 August 2014

Pithla

Pithla is a very common recipe in marathi homes. It is mostly prepared when we run out of veggies.
Usually after we are back home from a long journey and I want to prepare a quick and easy dinner, I go for Pithla-Bhaat-Thecha (Rice served with Pitla and some thecha).

Thecha recipe can be found at below link
Hirwi Mirchicha Thecha

Pithla is a very simple recipe where the besan is cooked with some masala. It goes very well with Gakar and is popularly known as Pithla-Gakar.

The Gakar recipe can be found at below link
Gakar Recipe


Ingriedients:
1 Onion - chopped
Cumin seeds (jeera) - one teaspoon
Mustard seeds - one teaspoon
Asaefatida(hing)
2 Green chillies - slit vertically
Turmeric powder - half teaspoon
Ajwain/ Carom seeds (owa) - 1 teaspoon
Besan (gram flour) - 4 tablespoon
Karipatta - 4-5 leaves
Oil
Water

Procedure:
1. In a mixing bowl, add 4 tabelspoon besan, salt and water and mix well. Make sure no lumps are formed.
2. In a vok (Kadhai), add 2 tablespoon Oil and add mustard. Once it crackles, add cumin seeds, ajwain, asaefatida, Karipatta and green chillies.
3. Next add chopped onions and fry till they turn golden brown.
4. Next add turmeric powder.
5. Next pour the besan mixed with water and stir well. Add around 2-3 cups of water.
6. Keep stirring in between so that the it does not sick the bottom.
7. Let it cook for around 10 minutes so that besan is completely cooked.

Garnish with chopped corainder.
The delicious Pithla is ready.
Serve it hot with Gakar or rice or fulkas

Notes:
1. If you are serving it with Gakar, fulkas or any Indian bread, add less amount of water while cooking (around 2 cups). If you plan to serve it with rice, add more water (around 3 cups). Adjust the consistency of water as per your likes.
2. You can skip the addition of onions from the recipe to prepare bin kandyacha pithla(Pithla without onions)
3. Make sure besan is completely cooked before turning off the gas stove.

Sunday 3 August 2014

Methi Pulao/ Methi Bhaat/ Fenugreek Leaves Rice

The onset of monsoon is the onset for fresh green leafy veggetables...that means the onset for trying the various recipes of these veggies.

After tasting the delicious methi pulao prepared by my friends mother, I thought of giving it a try.
The Methi Bhaat (as it is called in Kannada) came out really awesome. Hence posting this recipe.

This is a very simple recipe of methi pulao and it can be packed easily for our lunch boxes.
Methi has this speciality that it gives out its flavour to any item that it is combined with.
With Methi Aloo, the aloo (potatoes) tastes declicous.
With Methi Parathas, the parathas tastes decilious.
And now with Methi rice, the rice tastes delicious.


Ingriedients:

1 bunch methi leaves (fenugreek leaves) - cleaned and chopped
1 cup rice
3 green chillies - vertically slit
Karipatta - 5-6 leaves
1 teaspoon mustard
1 teaspoon jeera (Cumin seeds)
Hing
Oil
Water
Salt

Procedure:
1. Wash the rice and keep it aside for around 30 minutes.
2. In a steel pressure cooker, pour 2 tablespoon oil, add mustard and wait till it splutters.
3. Add Jeera, green chillies, hing and karipatta.
4. Finally add the the chopped onions with apinch of salt.
5. Once the onions become golden brown, add the chopped methi leaves and let it cook for 2-3 minutes
6. Next add the washed rice and mix well.
7. Finally add 2.5 cups of water and required amount of salt (as per taste) and pressure cook it for 3-4 whistles.
8. Once the cooker cools down, mix it well.

Serve the hot Methi Pulao with raita, pickle and papad.

Notes:

1. If you find the methi little bitter, add half teaspoon sugar while adding methi.
2. You can also add matar(green peas) to the rice, to prepare Methi Matar Pulao, which is much more delicious.
3. Instead of methi, you can also add Palak leaves(Spinach) to prepare palak pulao. I prepare pulao, even with  Dill leaves(Sabsige soppu\ Shepu). It tastes really awesome.
4. I usually add some carrot pieces to the pulao to make it more healthy.


Wednesday 23 July 2014

Sweet Corn Soup

My hubby is very fond of soups and I usually prepare Knor soups for him. This time I thought, why not give him some home made soups.

I decided to prepare his favourite sweet corn soup. This is my first attempt in preparing soup. It came out really awesome and I got a clean chit from dear hubby. Hence posting it on my blog :) A very simple and easy recipe, which definately deserves a try...


Ingriedients:
Corn kernels - 2 cups
Carrot - half cup, finely chopped
Corn flour - 2 teaspoon
Pepper powder
Salt
Water

Procedure:
1. Boil corn. Once it cools down, keep aside one handful of corn and grind the rest to a paste.
2. Take 4 cups of water and keep it for boiling. Once it starts boiling, add the finely chopped carrots. Let it boil for 5 minutes.
3. Next add the ground corn and mix it well.
4. Mix 2 teaspoon corn flour with 2 tablespoon water and add it slowly to the boiling soup.
5. Next add the boiled corn.
6. Finally add salt and fresh ground pepper.
7. Boil this for another 5 minutes

The delicious sweet corn soup is ready.
Serve it hot with bread croutons.


Notes:
1. You can also add other veggies like beans, etc as per your choice.
2. If the corn is not very sweet, add 1 teaspoon sugar.
3. Adjust the salt and pepper as per your likes.
4. For thicker soups, use less amount of water while boiling.
5. Chop the carrot finely so that it is easily cooked in water.
6. You can also add vegetable stock while boiling.

Thursday 17 July 2014

Ukdhe Tandul Pole\ Rosematta Rice Dosa

Ukdhe Tandul Pole or Rosematta Rice Dosa is a common snacks item served in Goa. Tandul stands for rice in konkani and Ukdhe Tandul stands for Rosematta Rice. Pole stands for Dosa.

I still remember by childhood days when mom used to prepare this in the evening. She used to serve this hot dosa toppled with ghee and little sugar coupled with hot chai. It was an amazing combo.

This time when my parents visited us, I asked them to get this ukdhe tandul from Goa as I wanted to prepare it for my little daughter. And as expected, she just loved these dosas.

The best part of this dosa is it does not need any fermentation and hence can be prepared immediately after grinding it in the mixer. Also the rosematta rice is highly nutricious as compared to the other rice. This dosa has a very peculiar taste which will keep addicting you. "No one can eat just one" :)


Ingriedients:
Ukdhe Tandul\ Rosematta rice - 2 cups
Salt
Water

Procedure:
1. Soak the Ukdhe Tandul (Rosematta rice) for at least 6 hours.
2. Grind the soaked rice in the mixer.
3. Add required amount of salt.


4. Take a pan and grease some oil on it.
5. Take a round ladle and pour the prepared batter on the tave.
6. It will spread on the tava. DO NOT move the ladle in circular motion like the way we prepare normal dosas.
7. Sprinkle some drops of oil and let it cook for 2-3 minutes.
8. Next flip it on the other side and let it cook for a minute.

Serve the hot Ukdhe Tandul Dosa with chutney.
Or spread some ghee on the hot dosa and sprinkle some sugar. Roll it and have it. It tastes awsome.

Notes:
1. You can also add some grated coconut to the batter to prepare Ukdhe Tandul Bhakri.

Wednesday 9 July 2014

Upasacha Thalipeeth

Yesterday was Ashaadi Ekadashi...also called motthi Ekadashi. Very special day for all Marathis. Most of the Maharastrians observe a whole day fast on this day. But most of the times, the fast turns into a feast :-) and we really enjoy fasting.

Yesterday, we also had a fast turned feast at my house with Sabudana Kichchdi for brunch, sabudana wada with hot chai for snacks and upasacha thalipeeth for dinner.

For Sabudana Khichdi recipe, refer below link
Sabudana Khichdi

The Sabudana Wada recipe, I will post soon.

Below is the recipe for Upasacha Thalipeeth.


Upasacha Thalipeeth served with curd


Ingriedients:
Upasacha Thalipeeth Bhajani- 200 gms (I used from K-Pra(Pune) brand)
2 Potatoes - boiled and mashed
Peanut powder - 5 tablespoon
Chilli powder - 1 teaspoon
Curd - 2 tablespoon
Sugar - 1 teaspoon
Water - preferably warm
Ghee
Salt

Procedure:
1. In a mixing bowl, add the Upsacha Thalipeeth Bhajani, mashed potatoes, peanut powder, chilli powder, Sugar and salt.
2. Next add curd and mix well.
3. Next add sufficient warm water to prepare the dough and keep it aside for half an hour.
4. To prepare thalipeeth, make four balls of the dough.
5. Next take a pan and add 1 teaspoon ghee. Place one ball on the pan and pat it to form a round thin roti like structure. Apply little ghee to your hands while patting to avoid sticking.
6. Make a small hole at the centre and pour little ghee in it. Also add ghee from all sides.
7. Fry on a median flame without covering the pan. After 5 mins, turn the thalipeeth other way round, still maintaining the medium flame. Fry for another 3 minutes.

Thalipeeth is ready to be served. Put one teaspoon ghee over the Thalipeeth while serving.

Serve the delicious Upasacha Thalipeet loaded with ghee along with some curd.


Tuesday 1 July 2014

Gakar

This is the first time, I am writing about some recipe from MP (Madhya Pradesh) cuisine, and that is the very popular Gakar. I learnt this from my mom in law. My hubby has some strands of origin from MP and hence my mom in law has mastered all the recipes from this state. More recipes will follow soon.
Gakar is a kinds of Indian bread which is complimented with the delicious Pitla. It is served togather as Pitla-Gakar. It can also be had with chutneys or any other gravies.

The Pitla recipe can be found at the below link.
Pitla Recipe

Below is the recipe of Gakar

Ingriedients:
Wheat flour - 4 cups
Ajwain/ Carom seeds - 1 teaspoon
Salt
Water
Oil

Procedure:
1. In a mixing bowl, add the 4 cups of wheat flour, 2 teaspoon salt and 1 teaspoon ajwain. Add sufficient water and knead it to form a dough. Add 1 tablespoon oil while kneading the dough. Cover it and keep it for half an hour. The dough should not be very soft, it should be like the one we knead for preparing Puris.
2. Make medium sized balls of the dough.
3. Next take the rolling board and roll it to form a small tikki. The size of it should be less than that of puri but slightly bigger than that of tikki. Also it should not be as thin as chapathi but slightly thicker that it. Roll four of these balls and keep it ready. While rolling, do not use wheat flour like the way we prepare chapathi. It should be similar to puri preparation. The kneaded dough should be such that gakhar can be easily rolled without sticking to the rolling board.
4. Take a pan and keep it on a low flame.
5. Add the rolled Gakhars on it. All the four rolled gakhars will fit on the tava.
6. Keep it for 2-3 minutes on low flame. Next turn all of them on the other side and keep it on medium-low flame for 3-4 minutes.
7. Finally one by one, place it on the gas stove on a high flame. They should open like Puris or Fulkas.
8. Transfer them to a casserrole and top it with loads of ghee.

The delicious Gakar is ready.
Serve the hot Gakar with hot delicious Pitla and Thecha.

Monday 23 June 2014

Sambhar

After staying for almost 8 years in Bangalore, one recipe that I have mastered from here is that of the delicious Sambhar.
If you happen to visit South India, you cannot miss out on the mouthwatering Idli Sambhar.

Sambhar is prepared by cooking the arhar dal with all the veggies and hence it is high in nutrition as well as proteins. Also it is a very easy way to introduce the veggies to your kids. In short, it is a healthpacked food. Having Idli Sambhar or Plain Dosa Sambhar is a good healthy start for your busy day.


Ingriedients:
Arhar dal\ Tur dal - 4 tablespoon
3 Sambhar onions or 1 normal onion - medium chopped
1 Tomato - finely chopped
2 Red chillies
2 small Brinjal - medium chopped
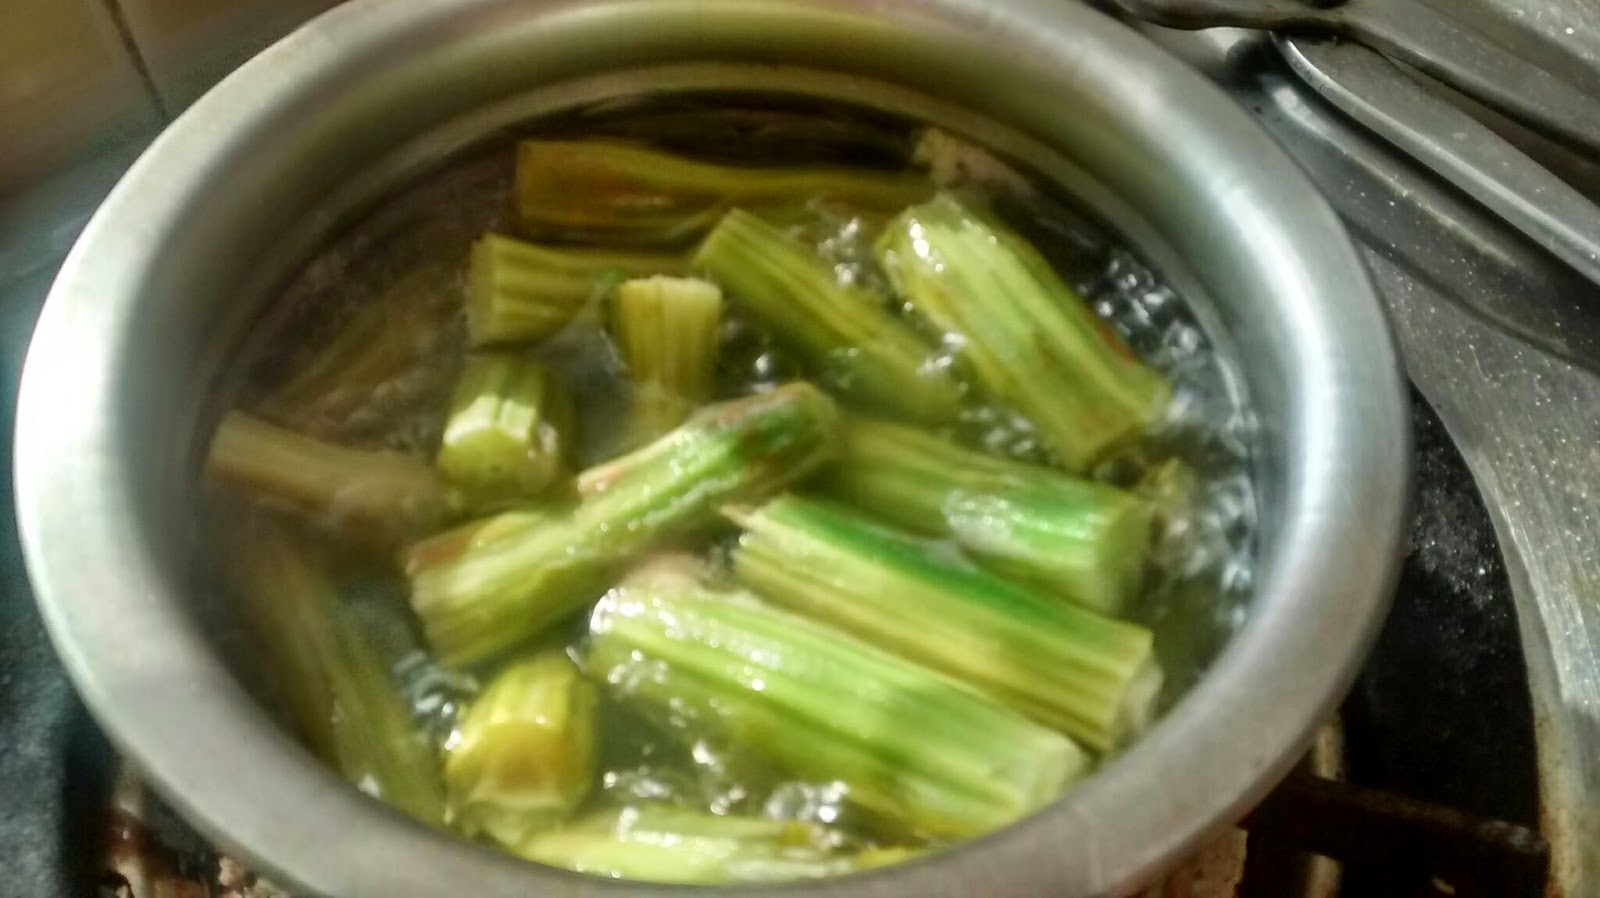
2 Drumsticks
1 Carrot - medium chopped
1 Cup Pumpkin cubes
Turmeric powder - half teaspoon
Chilli powder - half teaspoon
Sambhar Masala - 1 teaspoon (I generally use Everest Sambhar Masala)
Mustard seeds - half teaspoon
Jeera\ Cumin seeds - half teaspoon
Karipatta - 5-6 leaves
Asoefatida\ Hing
Cilantro\ Coraiander leaves - finely chopped
Salt
Water
Oil

Procedure:
1. Pre soak the arhar dal for about an hour. Also wash the drumsticks and chop it. Boil it with a pinch of salt for around 5 minutes. Keep this aside.


2. Take a steel pressure cooker, and add 2 tablespoon oil. Next add mustard. Once the mustard splutters, add the jeera.
3. Next add Hing, Karipatta and red chillies
4. Add the chopped onions with a pinch of salt.
5. Once the onion turns golden brown, add the turmeric powder, chilli powder and sambhar powder and let it cook for a minute.
6. Next add the chopped tomatoes and let it cook for another minute.
7. Finally add the chopped veggies. I have used brinjal, pumpkin and carrot. You can use any veggies of your choice.


8. Fry the veggies nicely with the masala. Next add the soaked dal.
9. Add 4 cups of water and necessary salt.
10. Let it pressure cook for 4 whistles.
11. Once the pressure cooker cools down, add the boiled drumsticks and mix well.
12. Then transfer the contents in a serving bowl and garnish with chopped corainder leaves.

The delicious sambhar is ready.
Serve it hot with Idlis and Dosas.

Notes:
1. Pre soaking the Arhar dal in water for 2-3 hours gives a very good consistency to Sambhar.
2. You can add any veggies of your choice like pumpkin, raddish, brinjal, carrot, Bhindi, etc.
3. You can also prepare sambhar by cooking the dal and the veggies togather(do not add Okra) in pressure cooker and adding the seasoning(tadka) later. In this case, add the okra after the tadka and let it cook for some time and then add the boiled veggies and dal.
4. Another way of preparing sambhar is to cook all the veggies and dal togather with onion in pressure cooker and then prepare the seasconing and pour it in the cooked dal and veggies.